The following is a step by step guide for adding new tenants in URent.
1. Click Tenants

2. Click Add Tenant

3. Add the Tenants Details:
- Tenant Type (Individual - Company) (Required)
- First Name (Required)
- Last Name (Required)
- Email Address
- Mobile Number (Required)
- Language Preferences (Arabic - English) (Required)
- Civil ID
- Nationality
- Contract Start Date
- Contract End Date
- Predicted Leaving Date
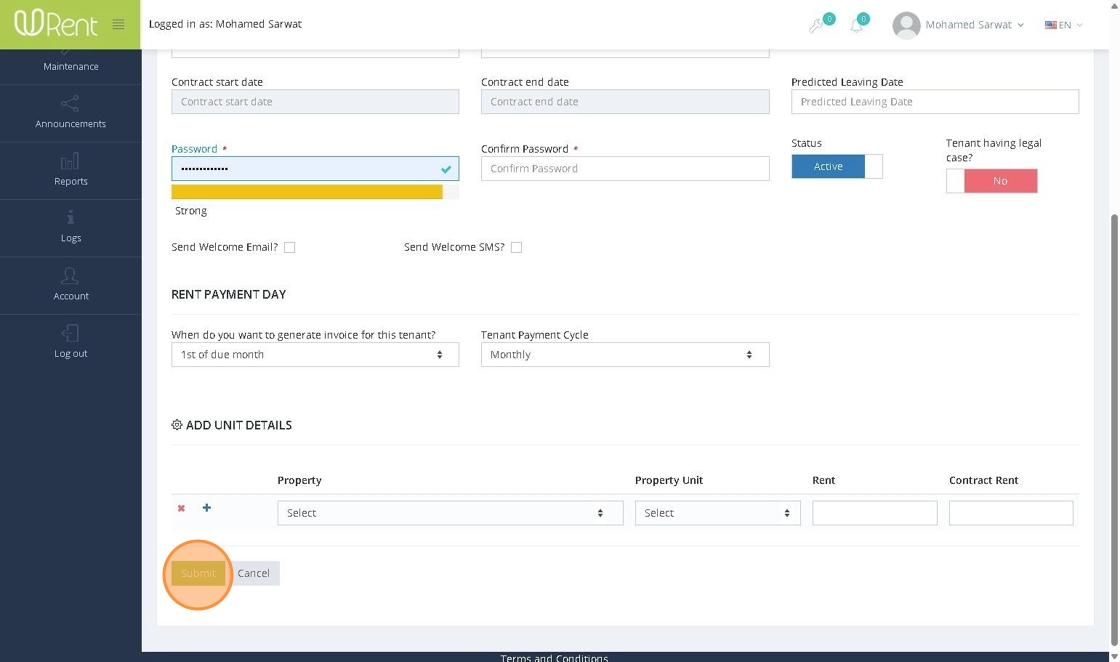
- Password + Confirm Password
- Status
- Tenant Having Legal Case?

4. Choose the welcome message options:
- Option: Send Welcome Email?
- Option: Send Welcome Whatsapp/SMS?

5. Enter the Rent Payment Date options:
- Rent Payment Day (20 - 28 Previous Month | 1 - 15 Due Month)
- Tenant Payment Cycle (Monthly - Quarterly - Semi-Annually - Annually)

6. Assign the tenant to properties and units by selecting:
- Property
- Property Unit
- Rent
- Contract Rent

7. Click Submit to add the tenant

8. Your tenant will be added to the list
Once the landlord registers a tenant and choose the o, the tenant will:
Receive a welcome Email or Whatsapp/SMS if the landlord chose this option
OR: The landlord can acquire the Tenant Signup URL to share it manually with the tenant
Tenants will be able to reset their password and login to their tenant URent Dashboard where they can view their due and previous rents as well as maintenance requests and statuses

9. Click the Plus Icon to show the Properties and Units that the tenant is assigned to


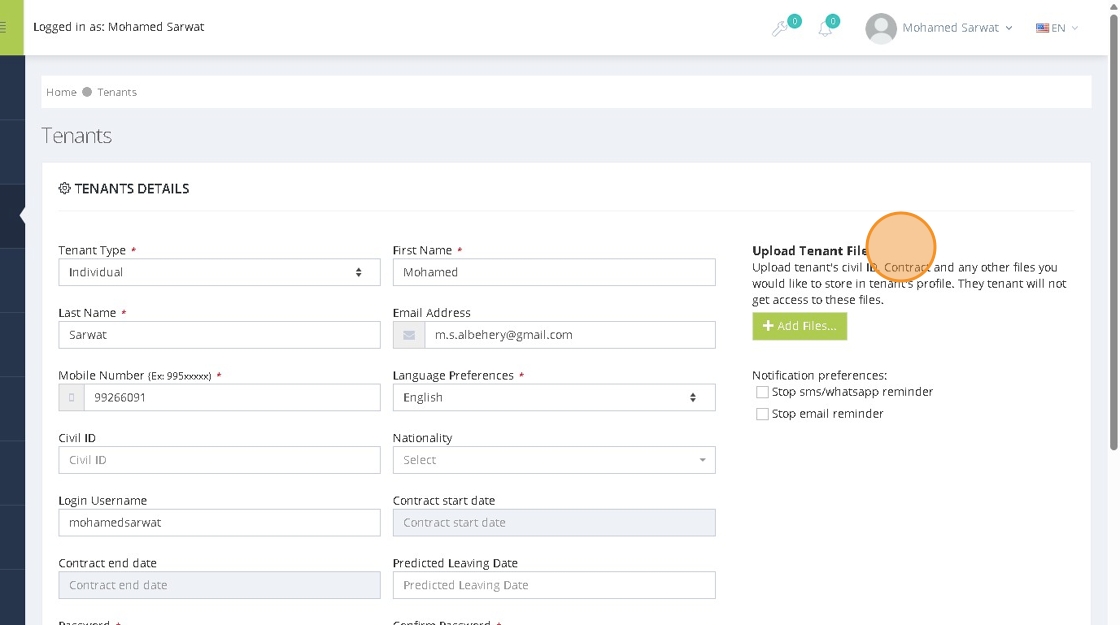
11. Click the Tenant Name to edit their information

12. You can upload tenant files

13. You can stop the rent collection reminders notifications

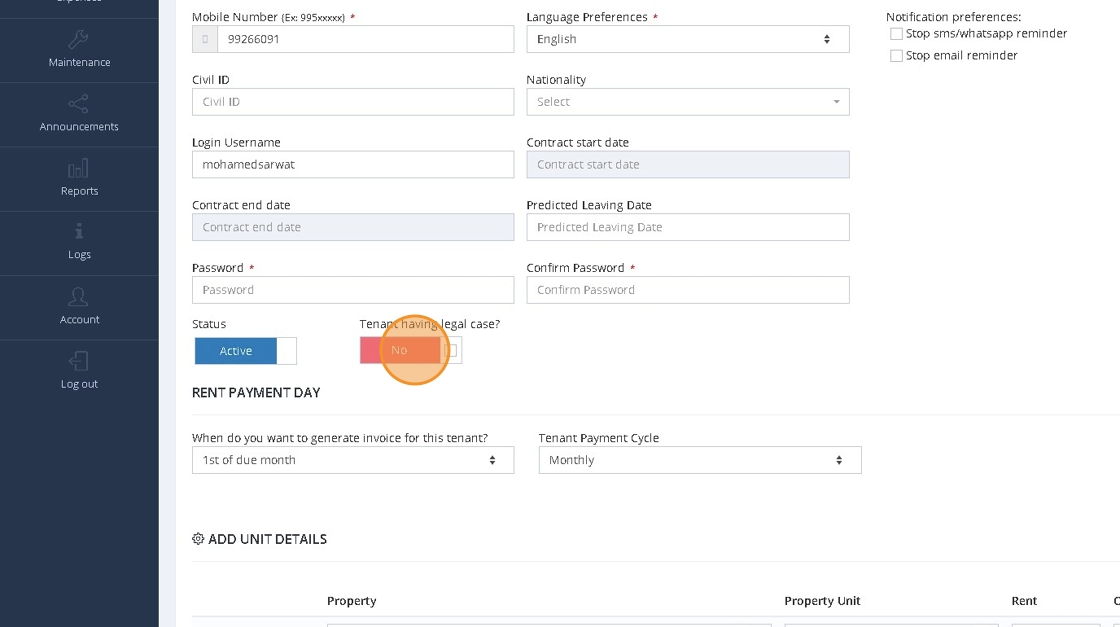
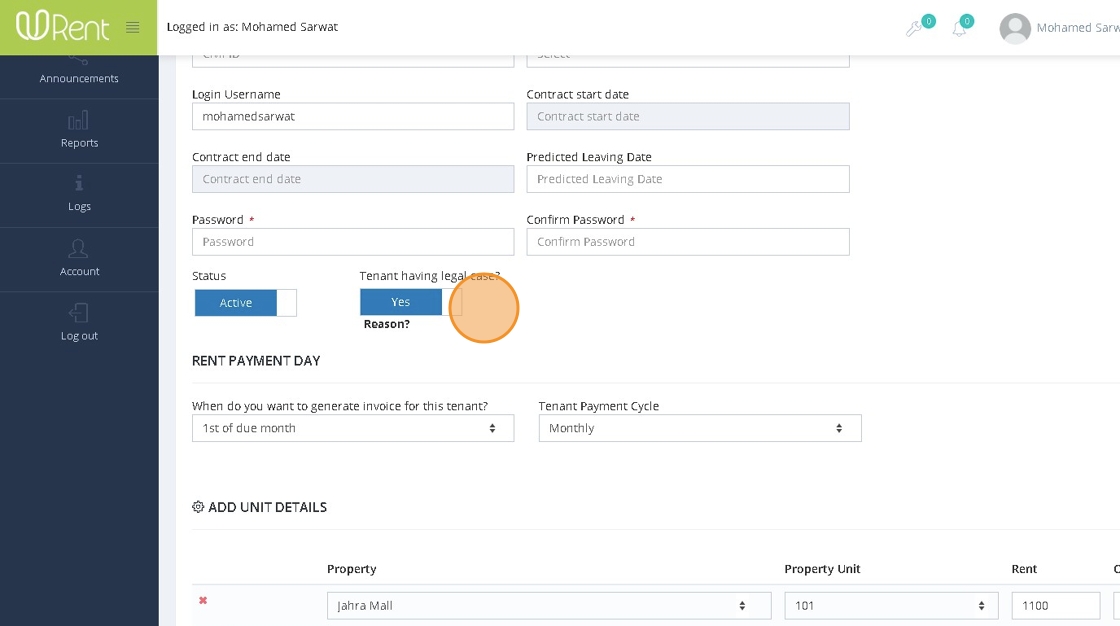
14. If the tenant has a legal case, toggle the option Tenant having legal case?
This will disable the tenant's ability to pay their rent

15. Add the legal case comment and click OK

16. Depending on your user privileges and any required approvals, the process of toggling a legal case for the tenant may differ

Was this article helpful?
That’s Great!
Thank you for your feedback
Sorry! We couldn't be helpful
Thank you for your feedback
Feedback sent
We appreciate your effort and will try to fix the article