You can refund invoices easily to your customers using UPayments Merchant Dashboard. The process helps you process refunds quickly and tracks the refunded invoices on the dashboard.
IMPORTANT NOTE: POS (K-NET) Machine type Invoices cannot be refunded.
TABLE OF CONTENTS
Initiate a Refund
First you will need to login to your UPayments account through: my.upayments.com then follow the steps below.
1. Click All Invoices
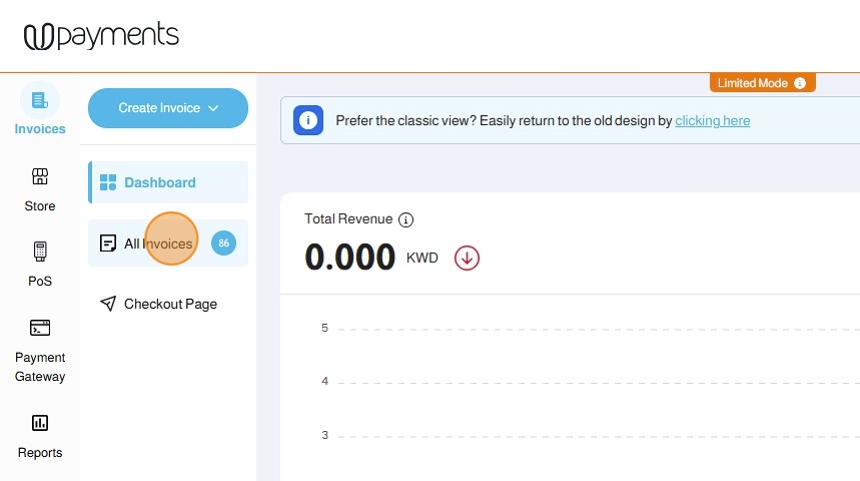
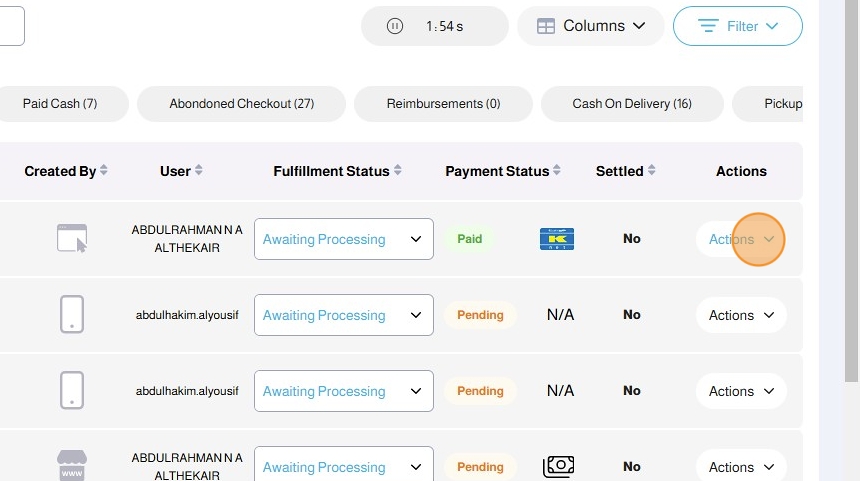
2. For the Invoice you would like to refund, click Actions
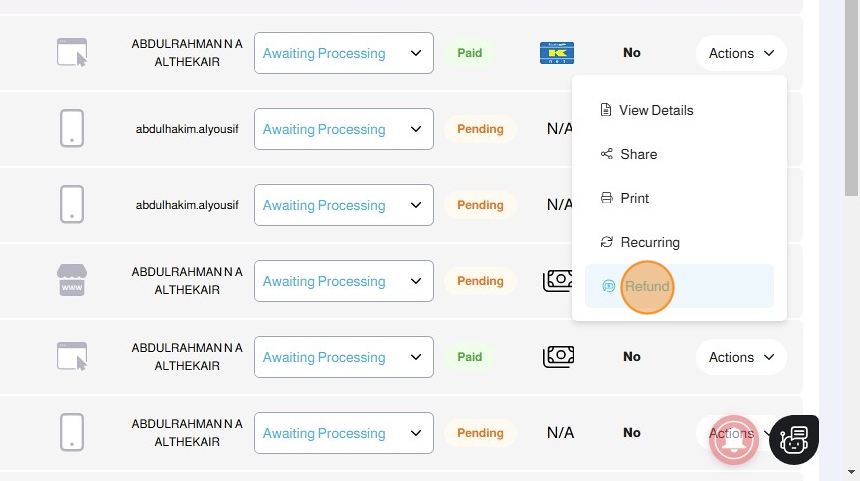
3. Click Refund
Refund Type: Full Refund vs Partial Refund
You will get a choice to fully refund the invoice amount (Full Refund) or refund a fraction amount of the invoice amount (Partial Refund)
For example: A paid invoice has the amount of 10 KWD

When you initiate a refund, you can:
Option 1: Enter the Refund Amount to be 10 KWD (Full Refund)

Option 2: Enter the Refund Amount to be less than 10 KWD - For Example: 5 KWD (Partial Refund)

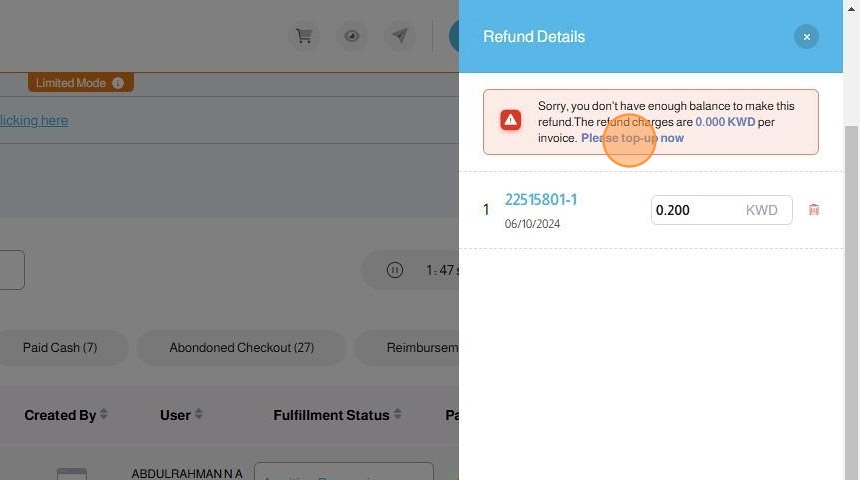
4. If you do not have the required balance to complete the refund, you will be required to top-up your balance first. Click Please top-up now
5. In the Top up your Balance popup, enter the amount you need for completing the refund(s)
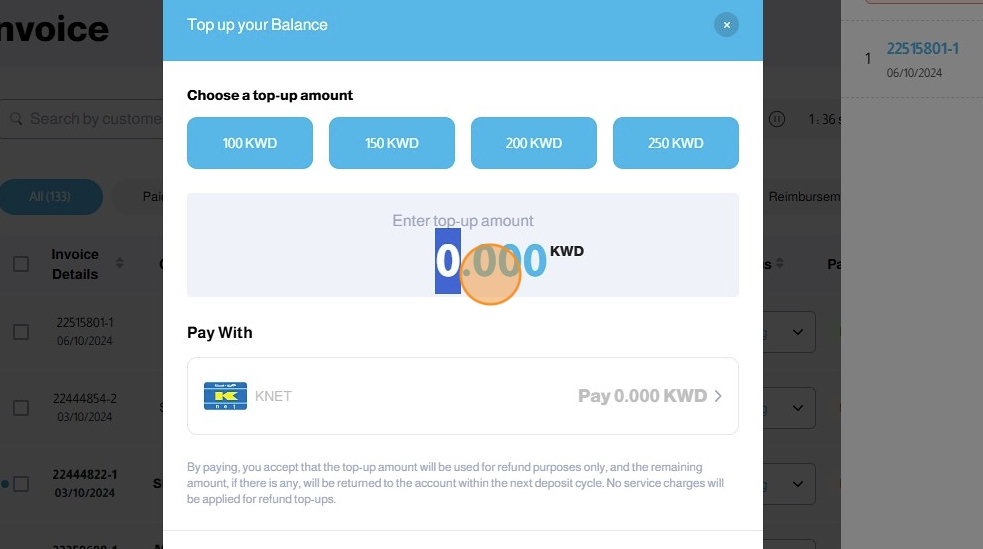
6. Click the Pay button to proceed with your payment
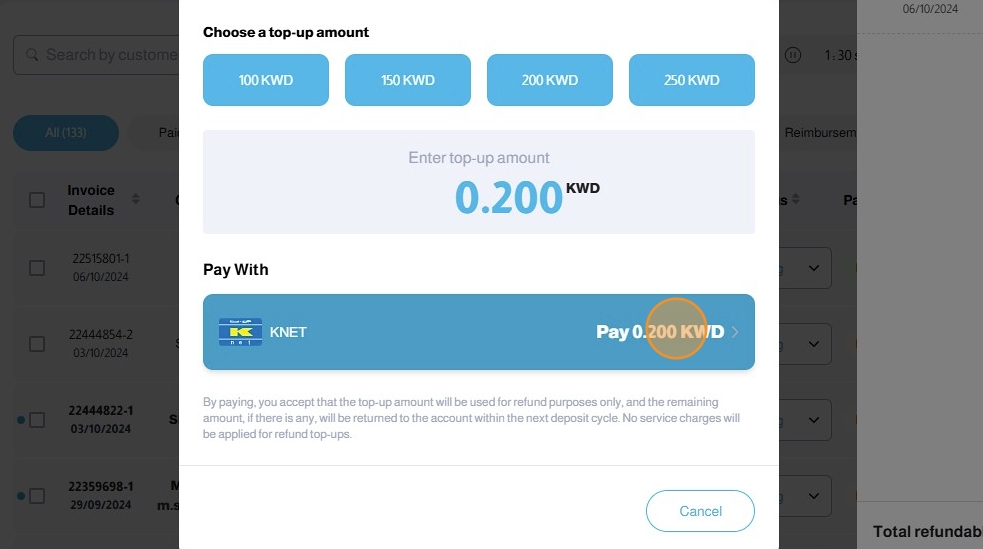
7. After completing the top-up payment, you will receive a confirmation popup

8. Now that your balance is enough to process the refund, you will be able to click Refund
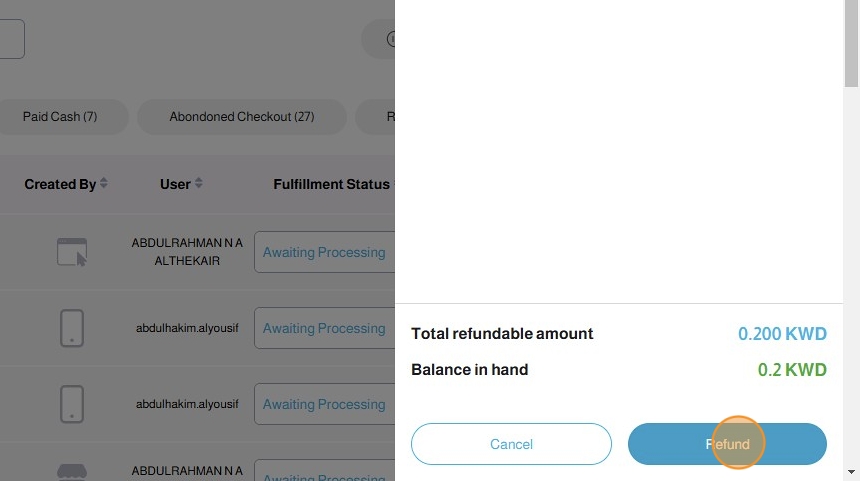
9. Click Yes, Continue on the confirmation popup to proceed with the refund
Important Note: A Refund Fee of 100 Fils will be deducted for each refund

10. The invoice will show Refunded under the payment status
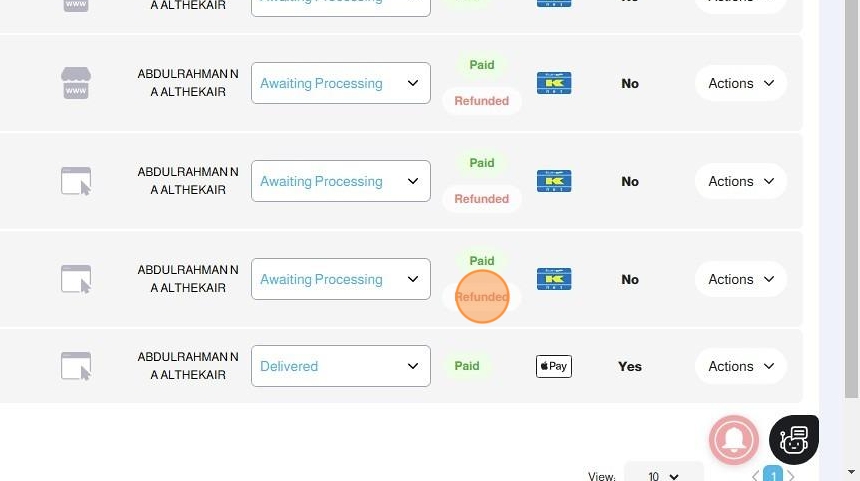
11. To view all refund requests and their statuses, go to Reports --> Refunds


12. In the Refunds Page, you can view all refund requests and their statuses as follows:
UPayments Refund Status (Bank Refund Status)
- Yes: The refund has been successfully processed by UPayments and captured by the issuing bank.
- Yes (Not Captured): The refund has been completed by UPayments but has not been captured by the issuing bank. The amount has been returned to your account.
- No (Not Captured): The refund attempt was declined by the bank. UPayments is currently processing the refund back to your original payment method. Once completed, the status will be updated accordingly.
- No: The refund has not been processed by either UPayments or the bank.

Cancelling Refunds
There are cases when you want to cancel an initiated refund. In this case, you are stopping the refund process from going through. Note that this can only be done if the Refund Status is "No: The refund has not been processed by either UPayments or the bank."
To cancel a refund, follow the following steps:
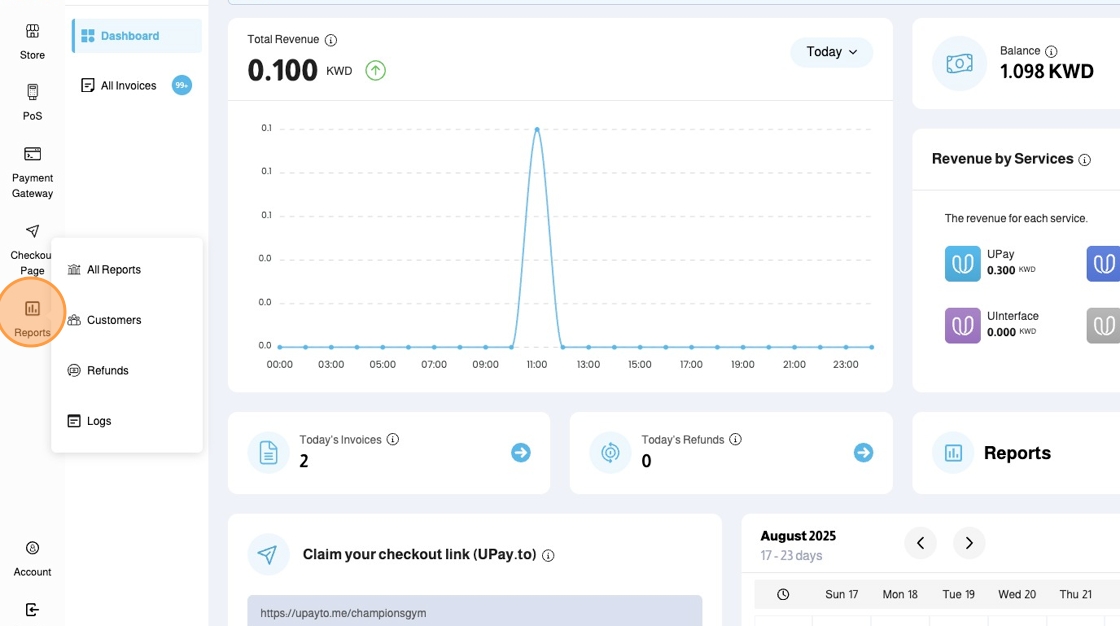
2. Click Refunds
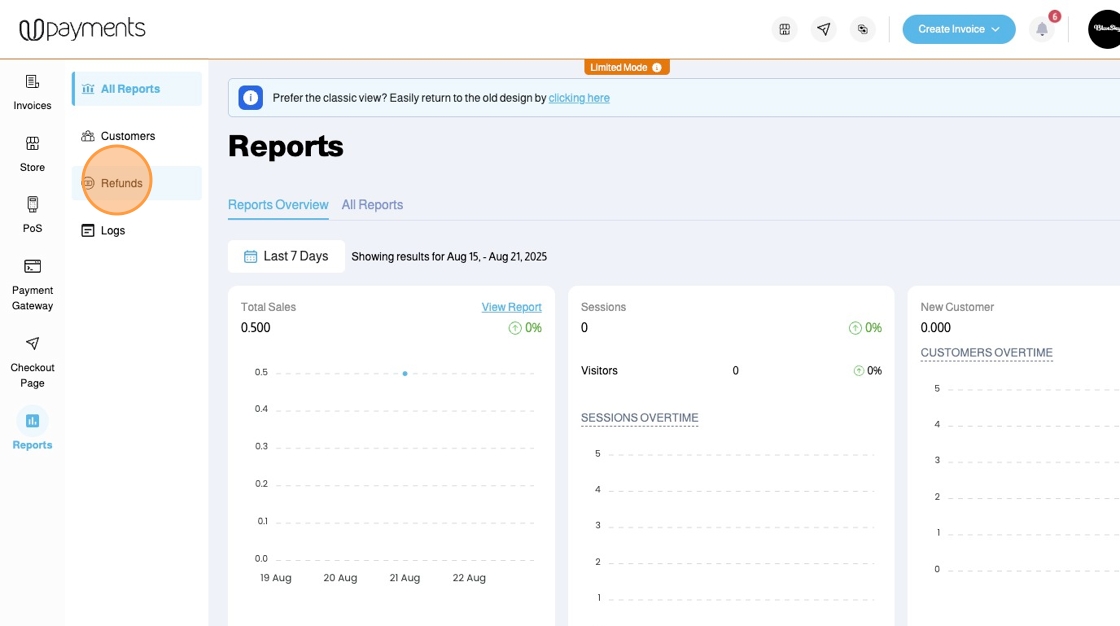
3. You can view all the initiated refunds in the Refunds Page
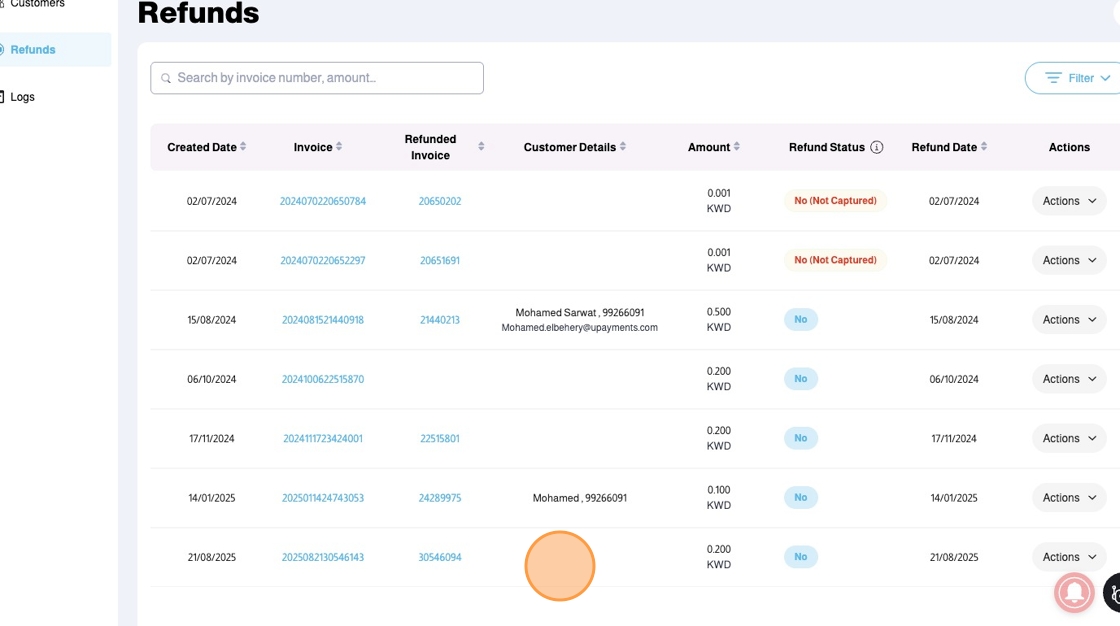
Please note that the only Refund Status that can be cancelled is: No
UPayments Refund Status (Bank Refund Status)
- Yes: The refund has been successfully processed by UPayments and captured by the issuing bank. (Cannot be Cancelled)
- Yes (Not Captured): The refund has been completed by UPayments but has not been captured by the issuing bank. The amount has been returned to your account. (Cannot be Cancelled)
- No (Not Captured): The refund attempt was declined by the bank. UPayments is currently processing the refund back to your original payment method. Once completed, the status will be updated accordingly. (Cannot be Cancelled)
- No: The refund has not been processed by either UPayments or the bank. (Can Be Cancelled)
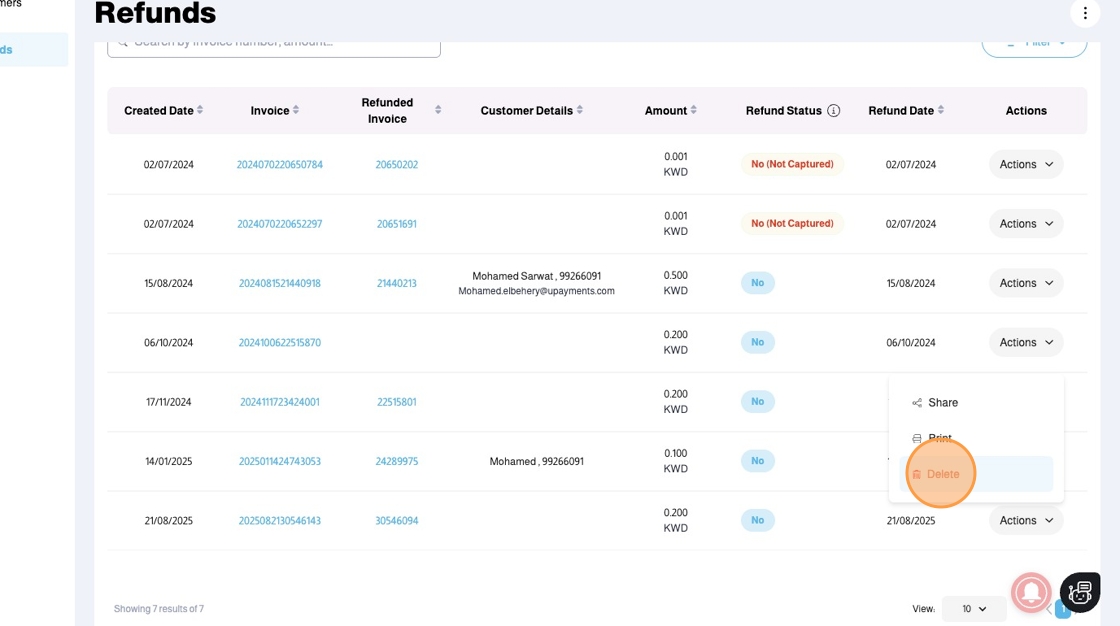
4. For an invoice with "No", click Actions
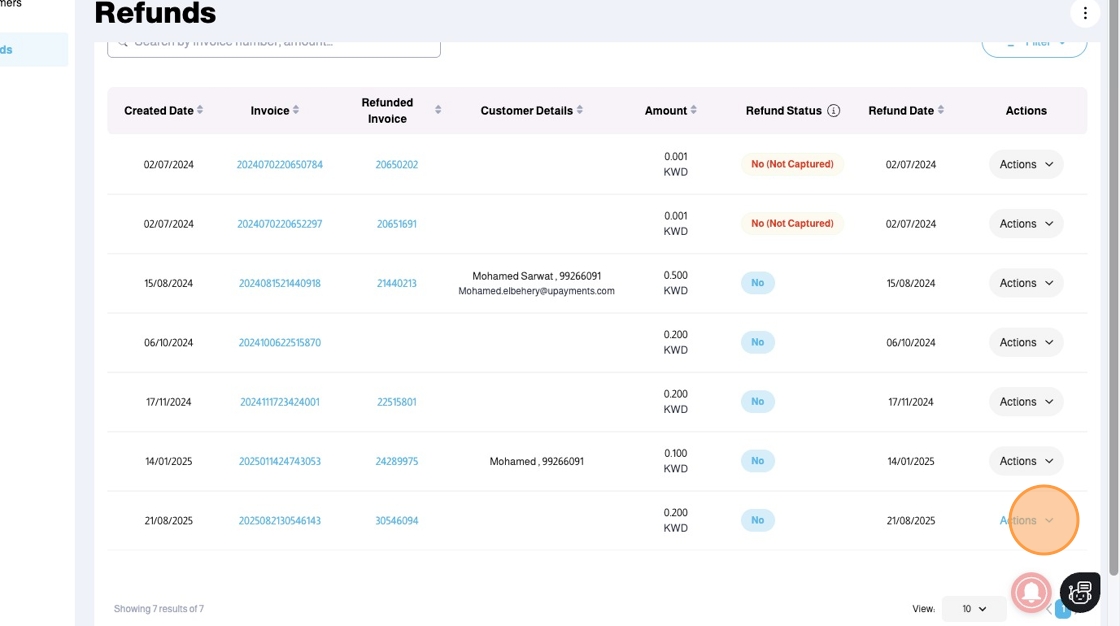
5. Click "Delete" to cancel the Refund
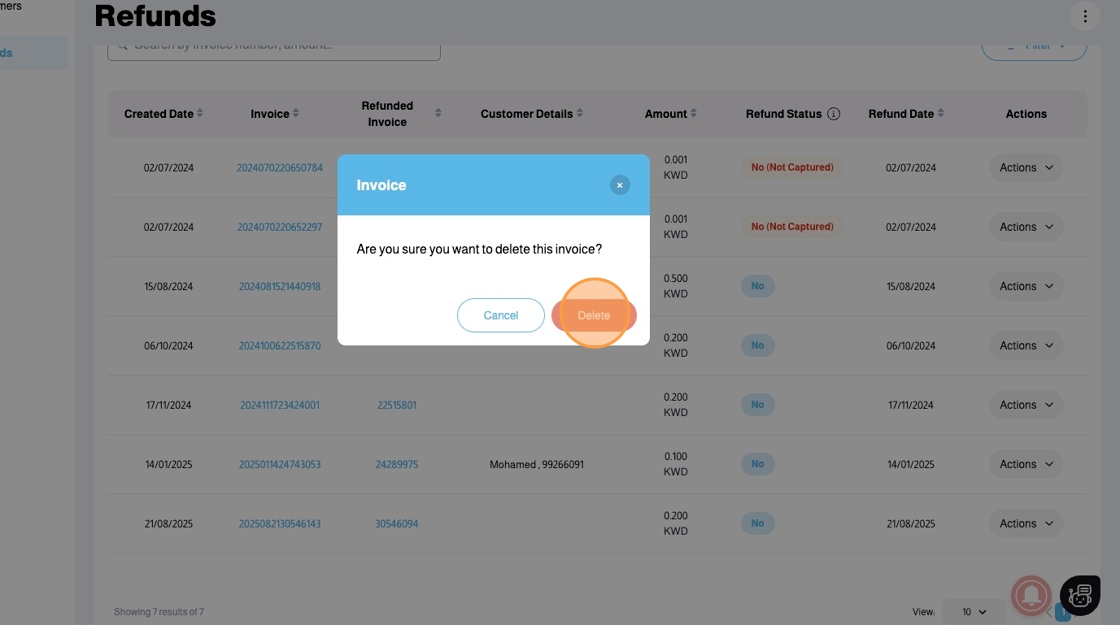
6. Click "Delete"
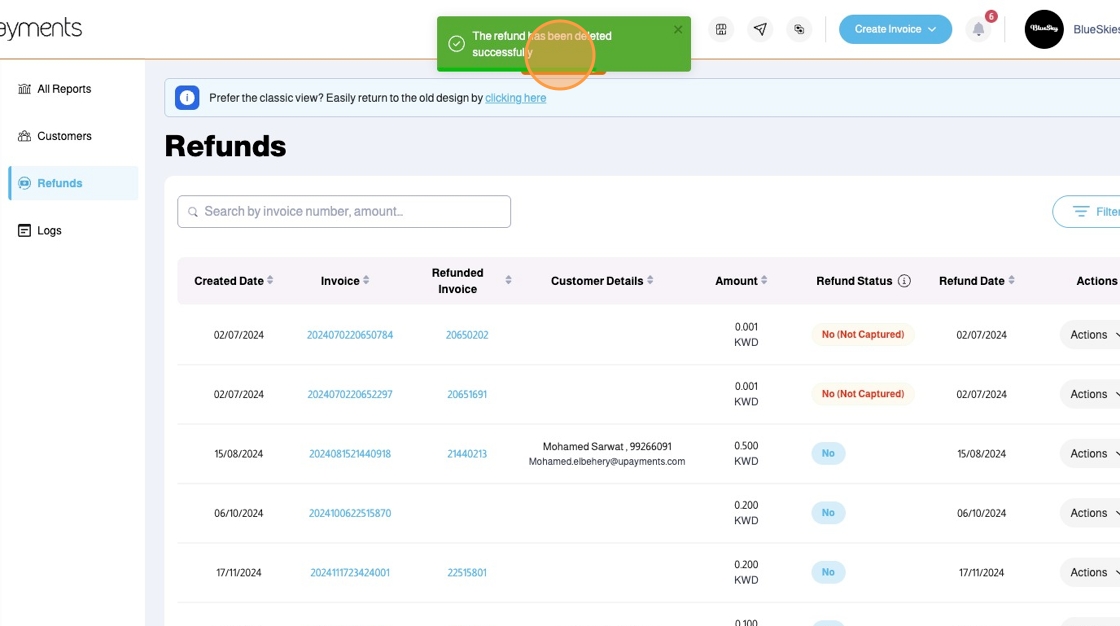
7. A message will show confirming "The refund has been deleted successfully"
Refund Approvals
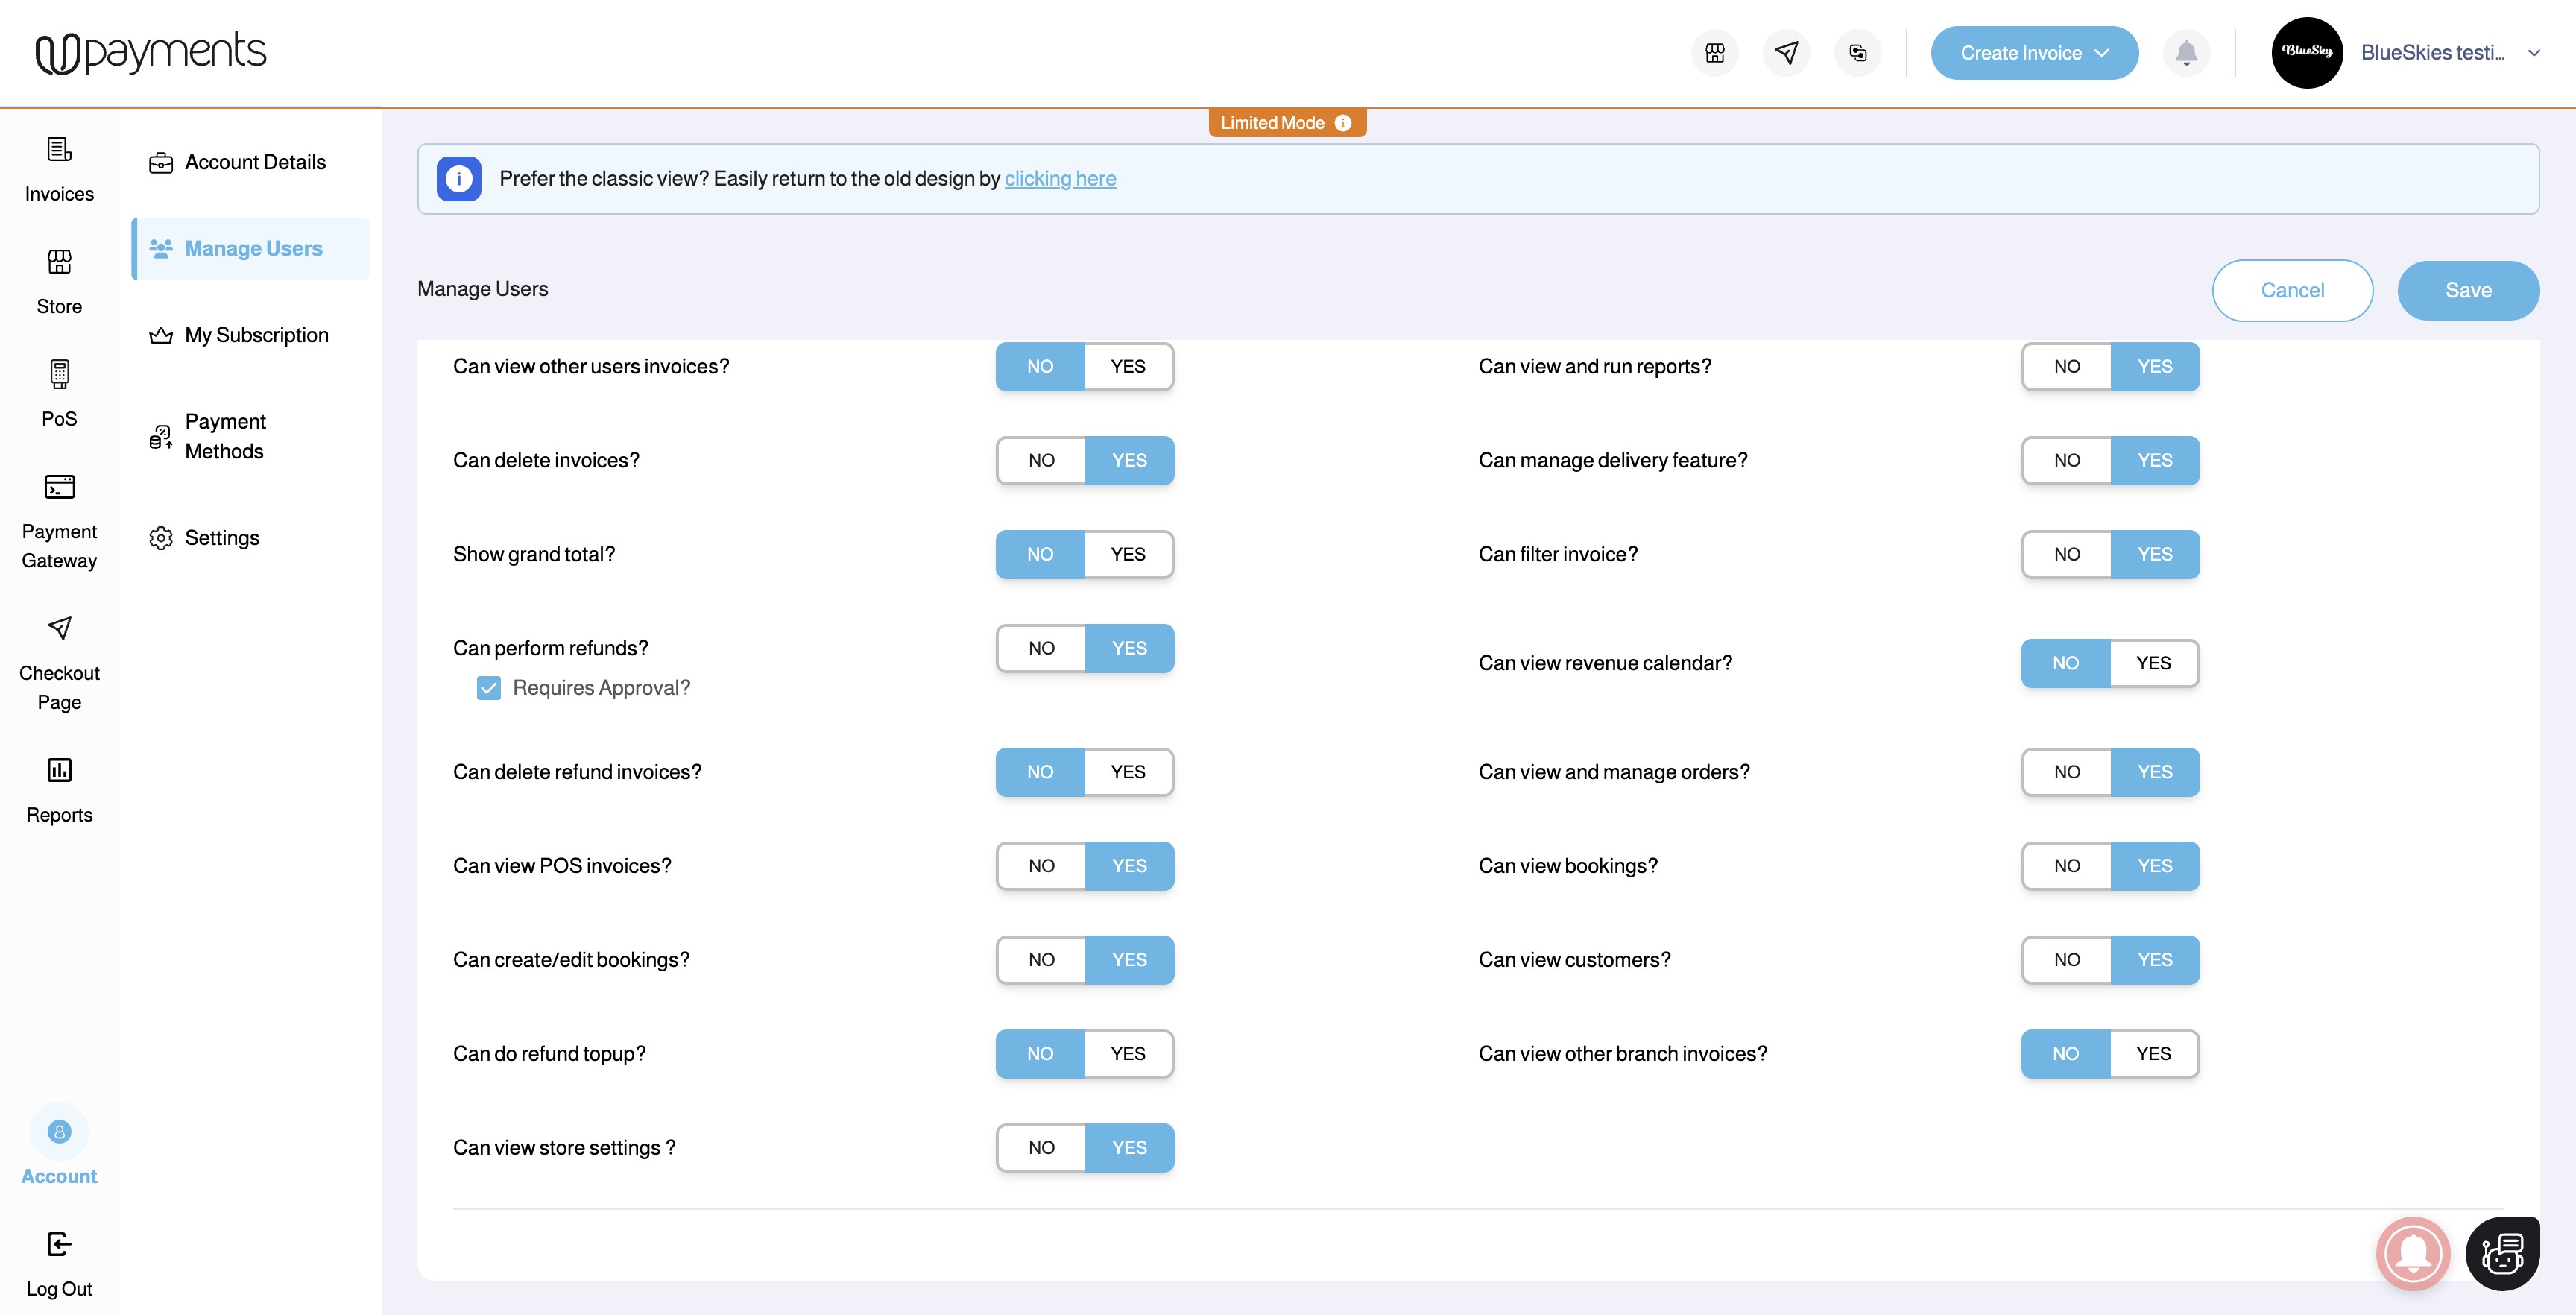
Sub-User Refund Approval Setup

With the above steps, your sub-users will be required to get approvals for their refund requests.
Sub-User Refund Request and Admin Approval or Rejection
Sub-User Side
1. The sub-user will navigate to All Invoices
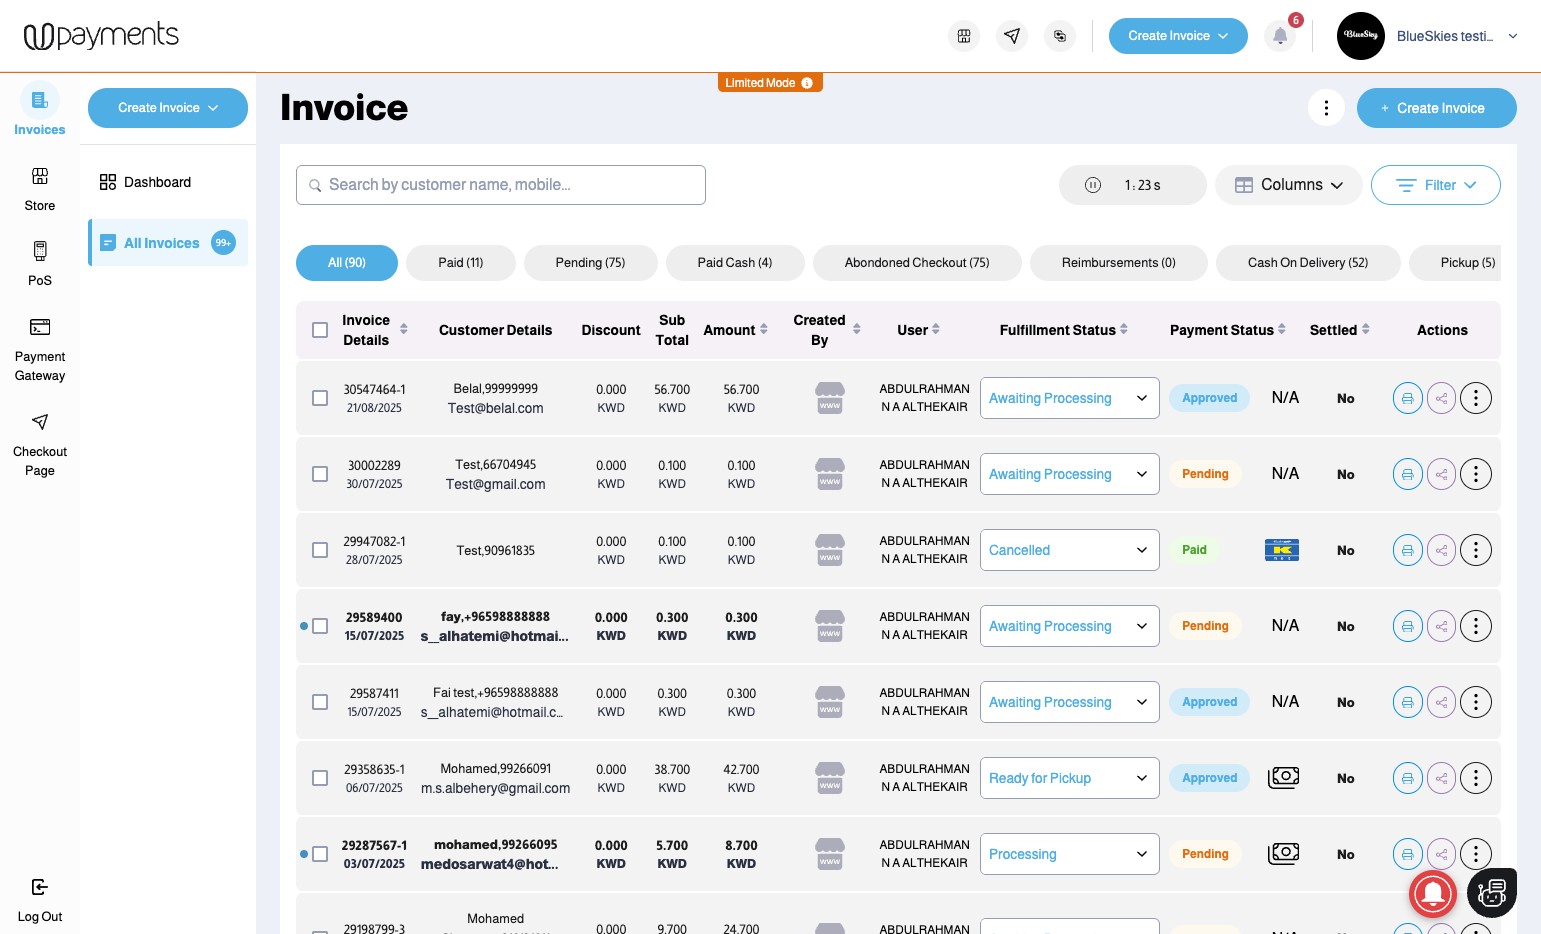
2. The sub-user will choose the invoice to be refunded --> Click the Three Dots Settings Dropdown and choose Refund


3. The sub-user will enter the refund amount (Full or Partial) then the Refund Reason (The Refund Reason will be shown to the admin to make a decision)
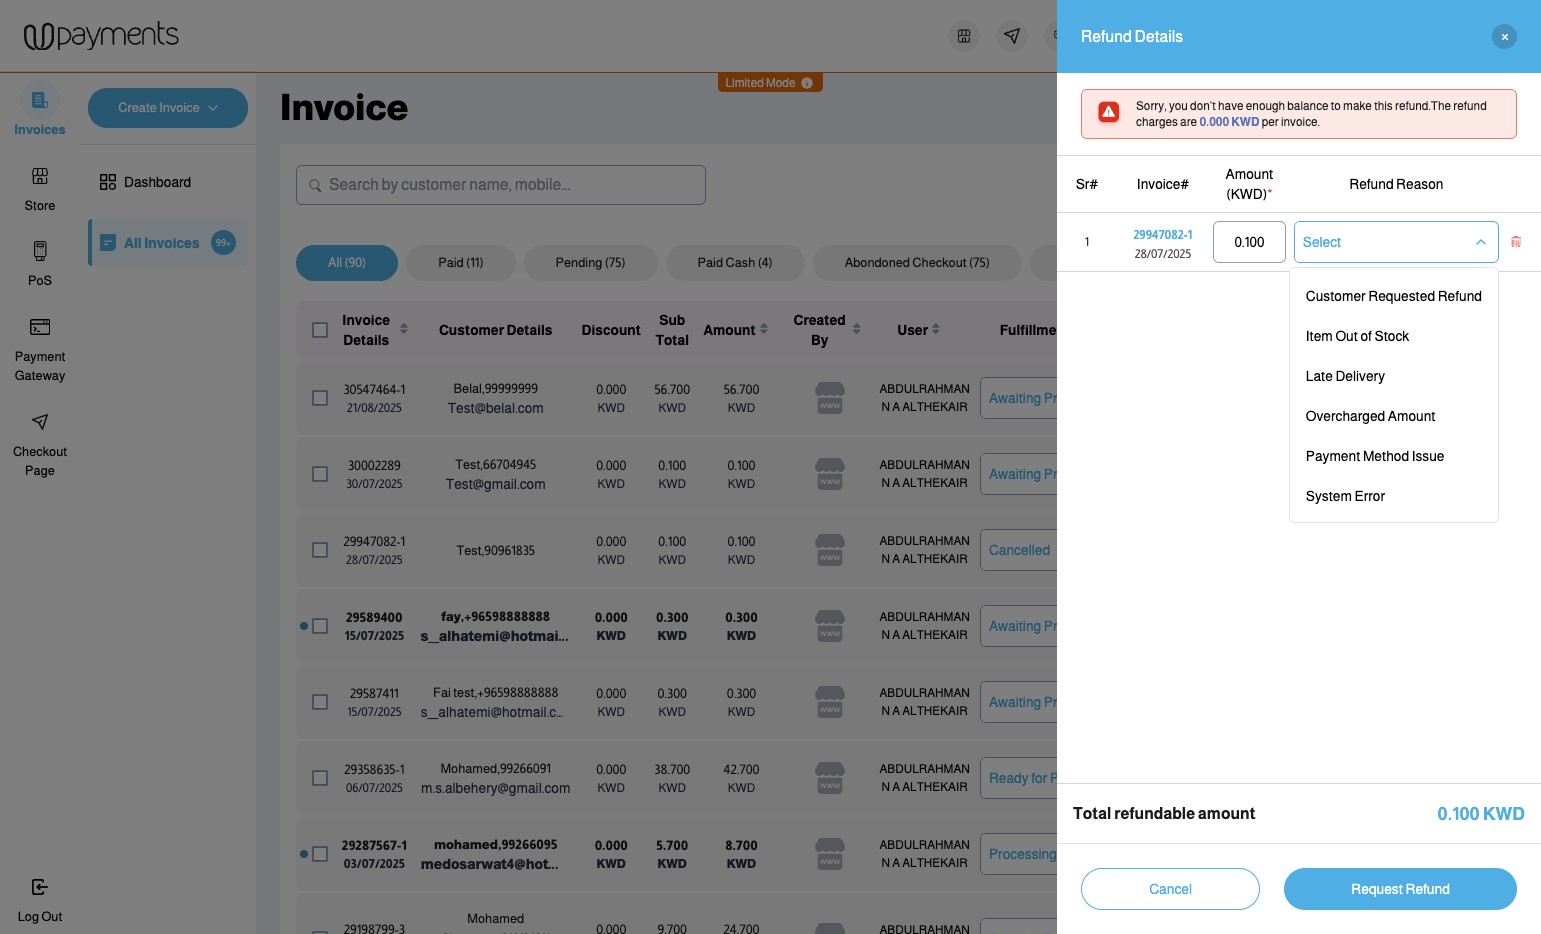

4. The sub-user will click: Request Refund

5. A notice will appear confirming that the Refund Request was sent to the admin

NOTE: If you allowed your sub-user to access reports from their account permissions, they will be able to view their initiated refund requests status by navigating to Reports --> My Refund Requests
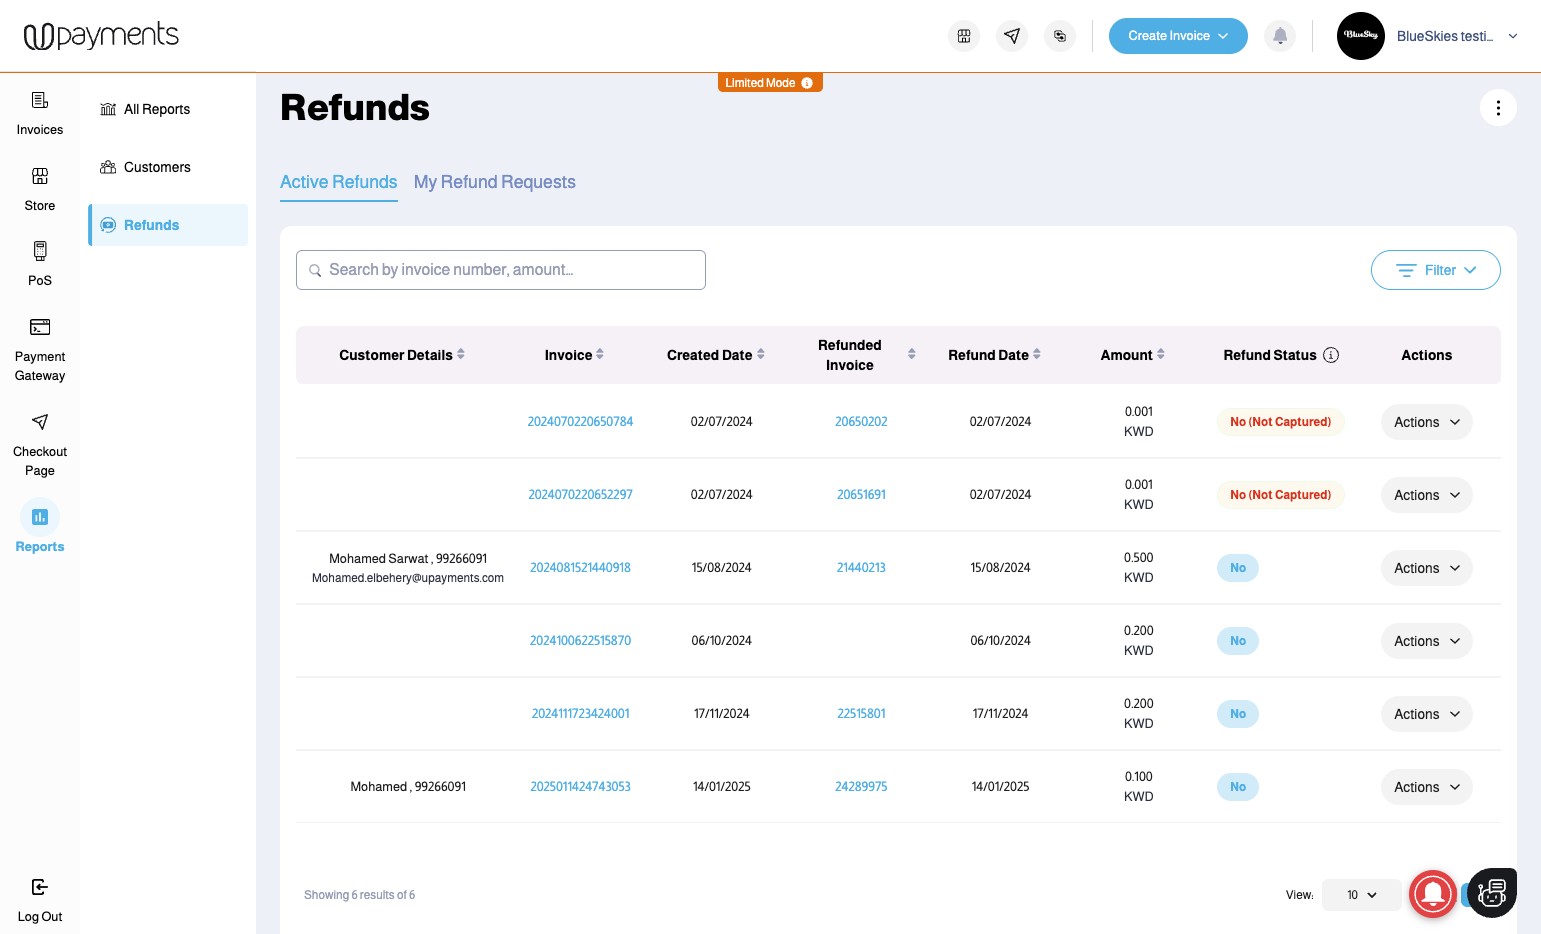

Admin Side
1. To view All Refund Requests, the Admin will navigate to Reports --> Refunds --> Refund Requests

2. In the "Refund Requests", the Admin will be able to view all refund requests initiated by sub-users with their status being "Pending"
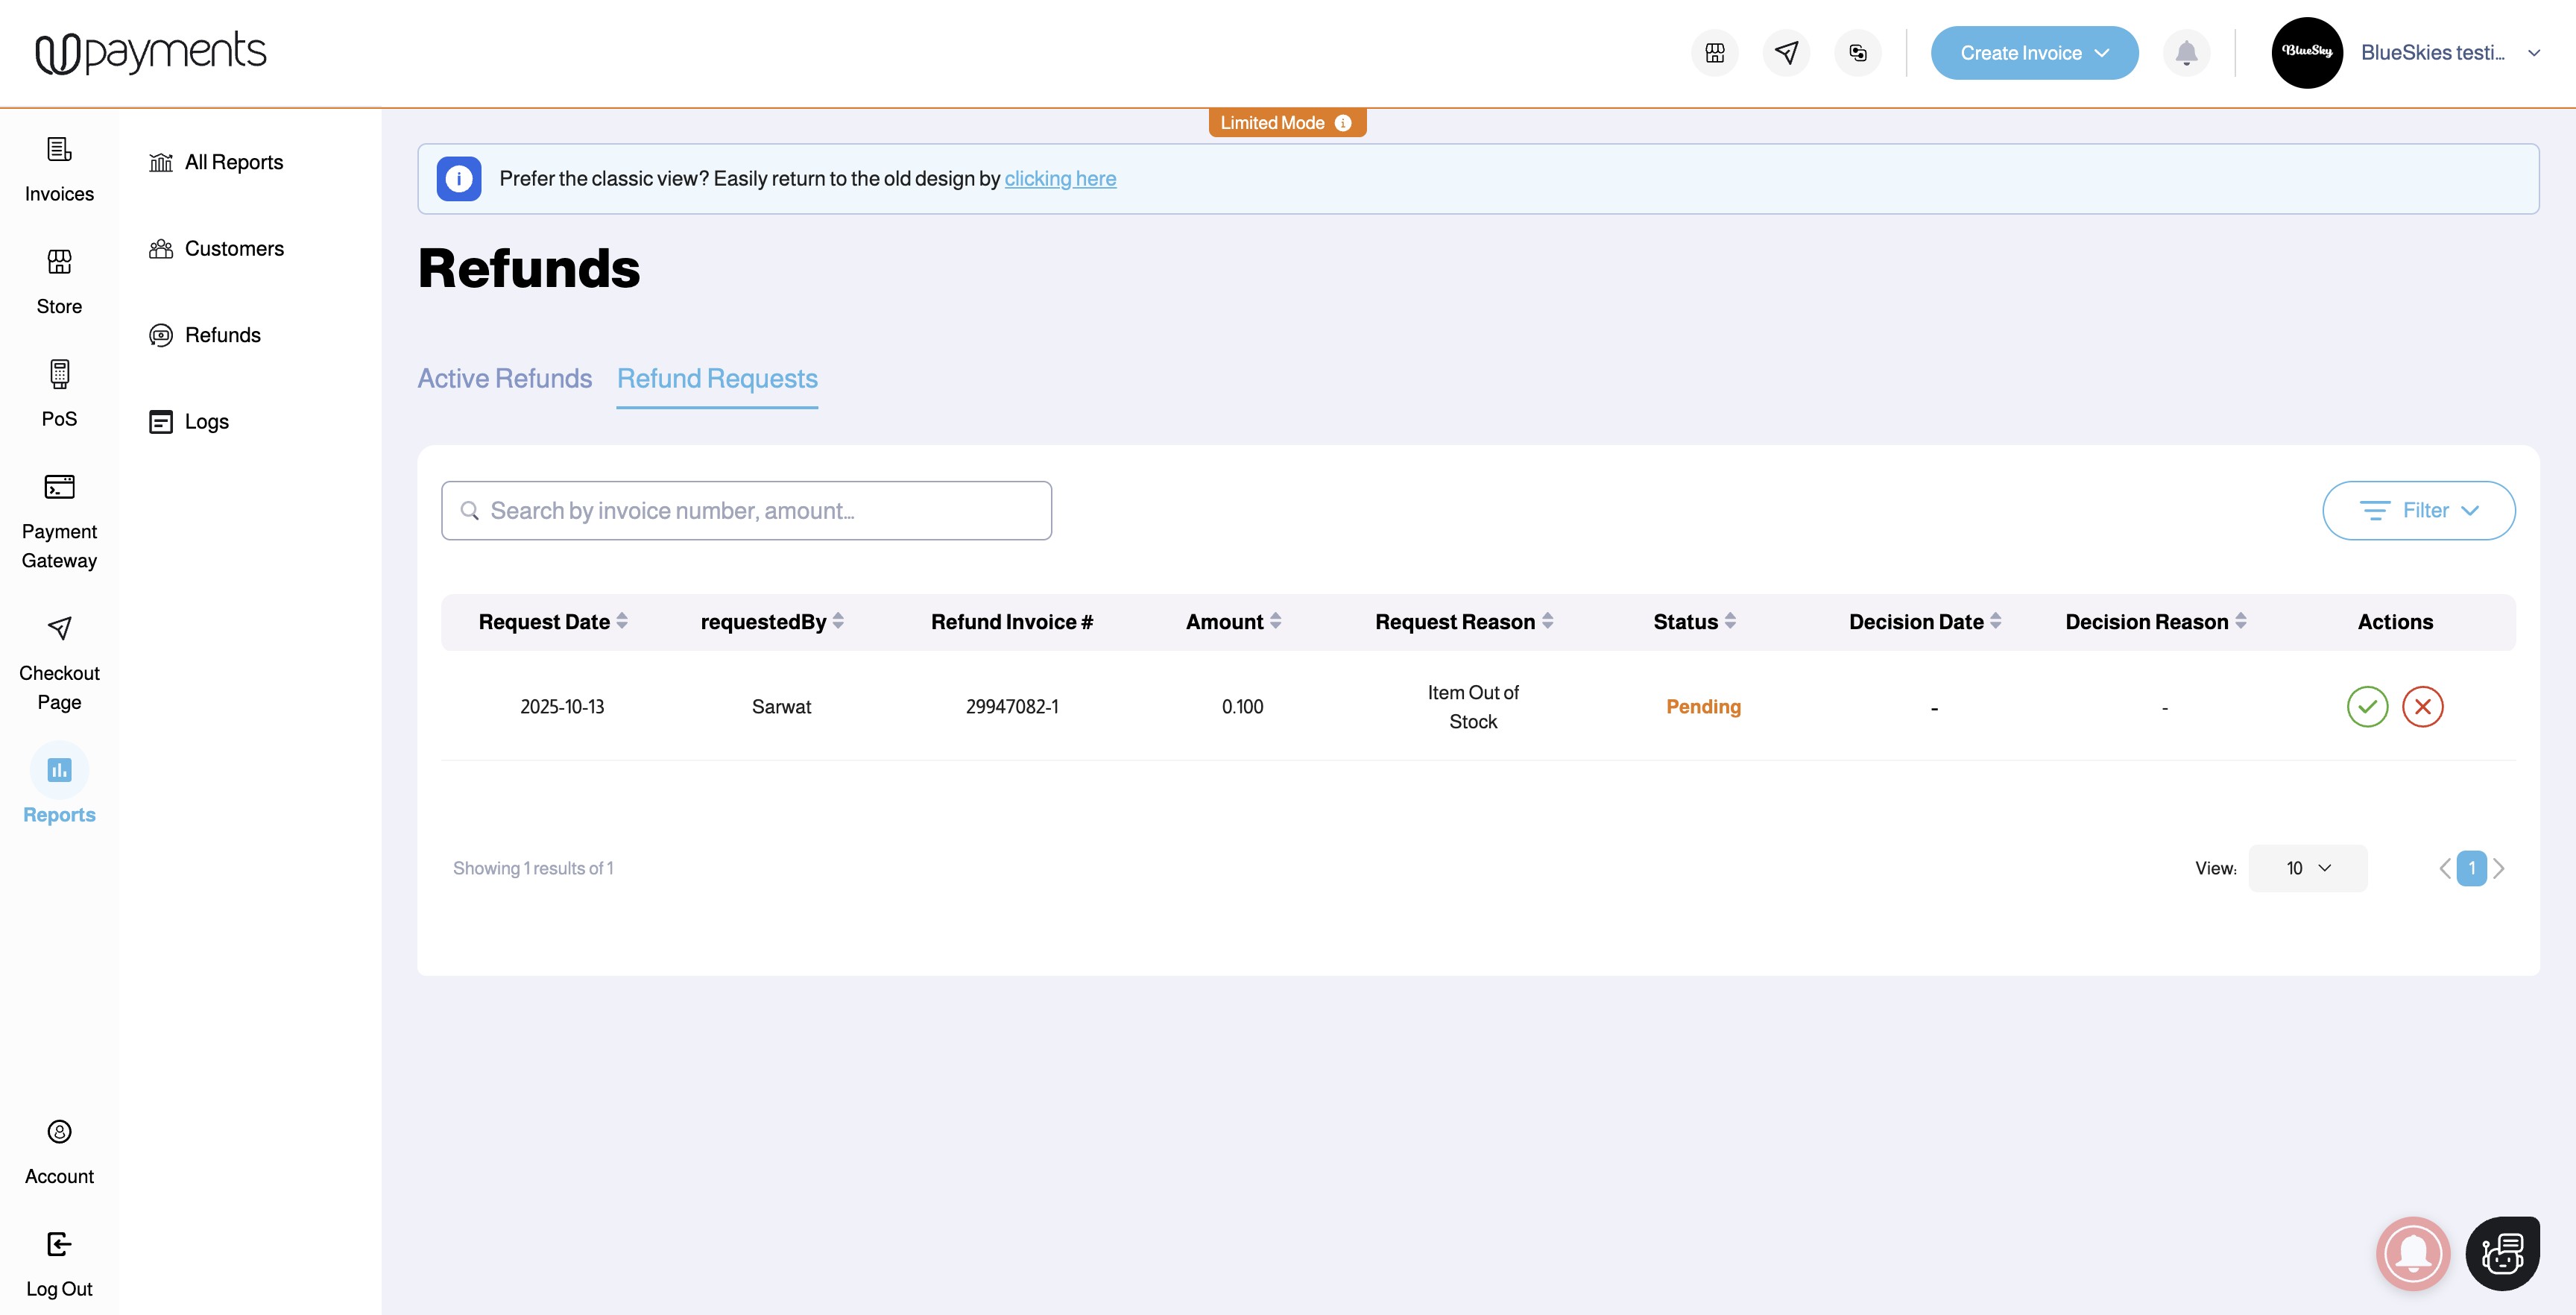
3. The Admin will be able to choose to Accept (Green Right Tick) or Reject (Red X Tick) the refund request

4. If the Admin accepts the refund, they will be prompted to proceed with their Top-up flow if the Balance in hand is not sufficient
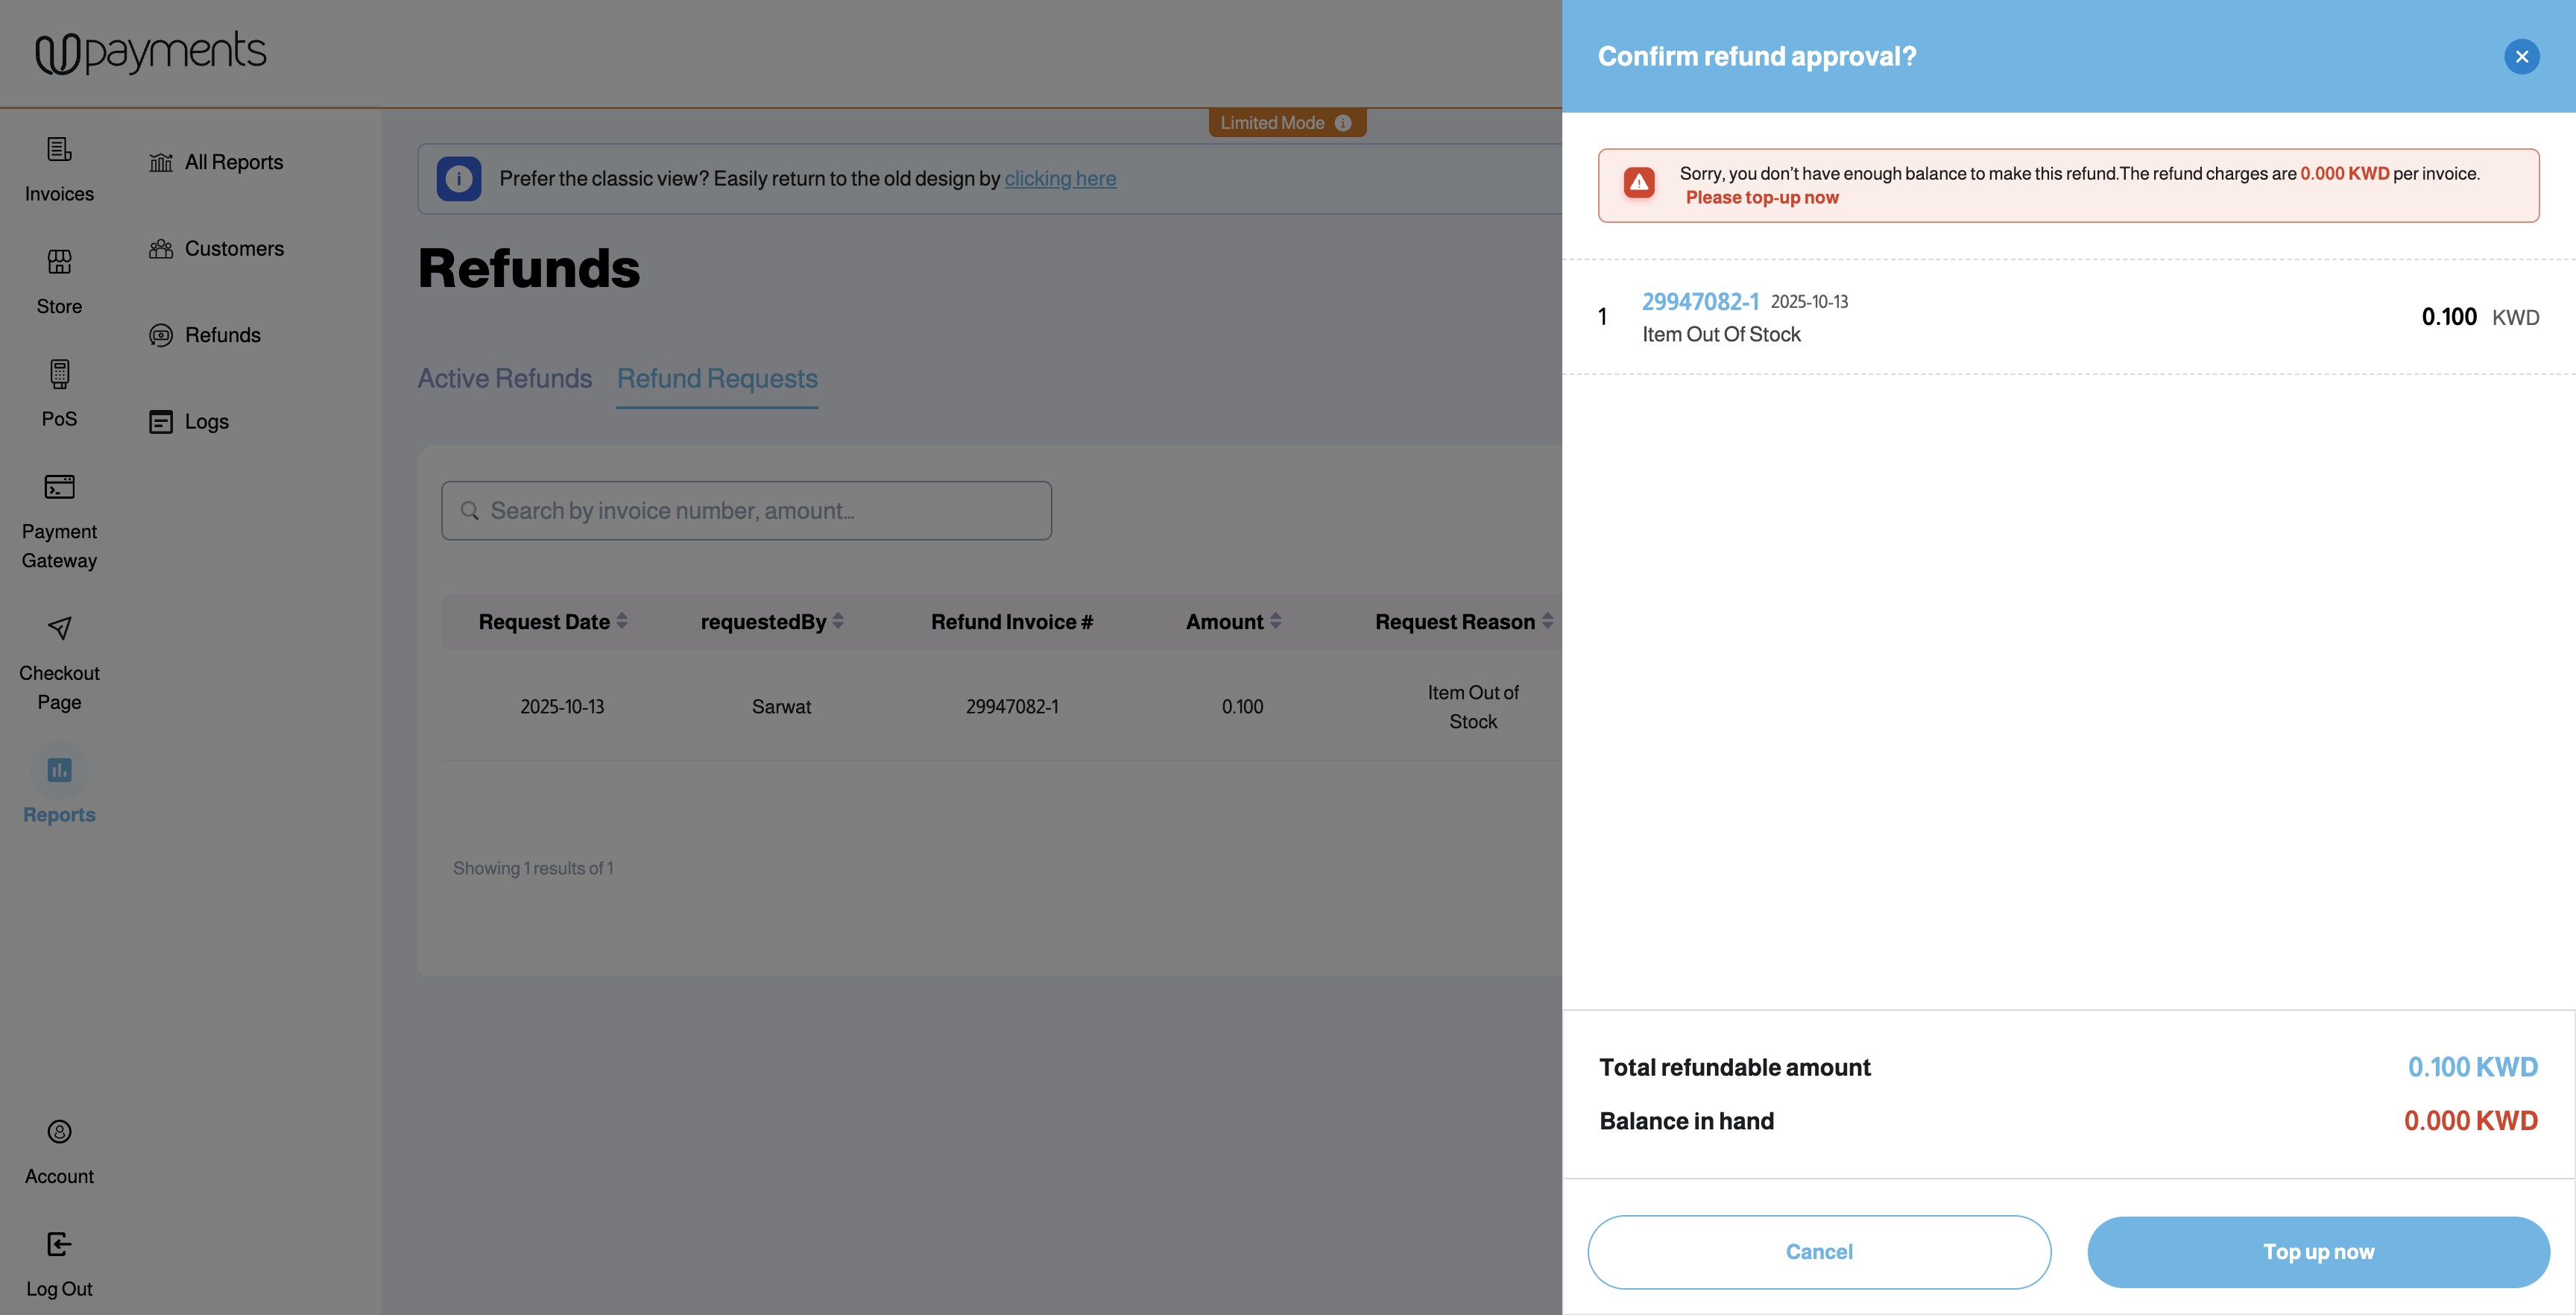
5. If the Admin rejects the refund, they will be prompted to confirm refund rejection and choose the reason for rejection

Was this article helpful?
That’s Great!
Thank you for your feedback
Sorry! We couldn't be helpful
Thank you for your feedback
Feedback sent
We appreciate your effort and will try to fix the article
